- Silhouette
- Shape
- Shade
- Smudge
- Shadow
This method, called the Five-S method is really easy to follow and you just progress through the steps from beginning to end. Here is an explanation of what each step means.
1 Silhouette: This is the first step. What you do here is look carefully at the subject you are drawing and then in light lines you draw a silhouette of it on the blank piece of paper. In this step you don't have to do just the outside lines of the subject you can do some of the inside lines too. But keep them very scant and very light.
2. Shape : Fill in the internal lines of the subject. Use the strokes and directions of your pencil to represent the shape of the parts of the subject. If a part of the subject is curved you should use curved lines in that area of the drawing and in any flat sections you should use straight lines. But for now you are not filling anything you are just getting the shapes right.
3. Shade : This is where you fill in the shapes with either color or shades of grey. Look carefully at your subject and note how light falls on it. This is the most important aspect of this step because even if a surface is all one color it may have different shades of that color depending on how light affects it.
4. Smudge : You can use your finger for this step but it is preferable to use a tortillon (blending stump). Very few subjects or objects are composed of sharply defined lines. Everything is composed of subtle gradations of color that flow around and through the surfaces. You should blend the colors on your subject using strokes that follow the shape of the subject - rounded areas should be done with rounded strokes etc.
5. Shadow: This is the final step. Look to see how your object or objects cast shadows on themselves or on the things around them and add these shadows. If you are using color in your drawing the shadows should be composed of darker shades of the same color. This will ground your object in reality. You should also use an eraser to erase any graphite or color from areas that have bright light reflections on them.
Drawing is not magic but it does take practice, skill, and an understanding of the process that is taken in order to go from a blank piece of paper to a finished product. The Five-S method is a good way of helping you to understand and to remember this process.
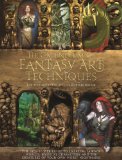
The Compendium of Fantasy Art Techniques -
Artists interested in graphic novels, comic book illustration, or computer game graphics will find a veritable course load of instruction in this mega-fantasy art manual. Combining the best of three of Barron's top fantasy art titles, The Compendium of Fantasy Art Techniques presents easy-to follow instructions and step-by-step illustrations that will teach readers the essential techniques for creating the fantasy world of their dreams.
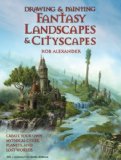
Fantasy Landscapes and Cityscapes -
Artists interested in graphic novels and comic book illustration will find all the guidance and inspiration they need to draw and paint landscapes that evoke myths and legends, lost empires, futuristic planets, dramatic dreamscapes, underwater worlds, and subterranean cities. Easy-to-follow instructions and step-by-step illustrations demonstrate techniques for rendering a wide range of fantasy features, whether working in ink, watercolor, or computer pixels. Details covered in this heavily illustrated volume include -- choice of materials, with advice on getting the most from software programs . . . basics of perspective, architectural geometry, color, mood, and seasonal variations . . . landscape features, including skies, clouds, mountains, caves, deserts, snow, and water reflections . . . imagined landscapes from ancient cultures, future worlds, alien planets, undersea worlds, and surreal dreamscapes . . . cityscapes, from medieval towns to the metropolis of the future . . . famous fantasy worlds, from Atlantis to Middle Earth. This good-looking and instructive volume features a gallery of fantasy and science fiction images among its more than 200 color illustrations.

Do you like making projects and exploring a variety of hobbies?
Sign up for my free newsletter. I give you regular updates on hobbies and projects you can make. it is totally free and I don't share your email with anybody. |