. Terrariums are making a comeback and it is easy to see why. They are easy to make and provide a little green space to brighten up any room. They will appeal to a wide variety of people too- plant people, fashionably retro people, kids of all ages, and people into recycling forgotten glassware. I find they make a great gift too- Like a bouquet of flowers except far more personal and artistic.
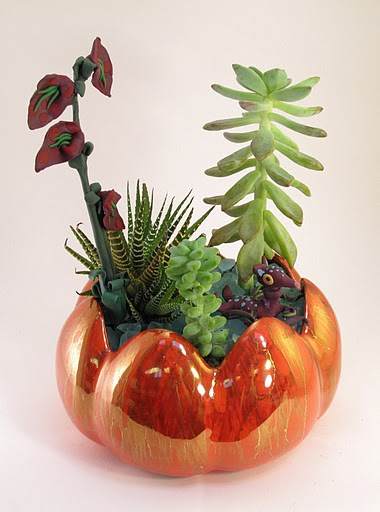
A couple bought this planter from me for a wedding gift
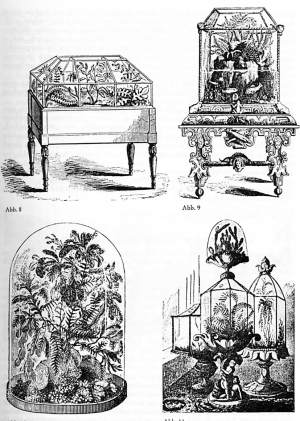
The fact that plants will thrive in enclosed containers was discovered in the 19 th century by Nathanial Ward. Wardian cases were initially a way to keep tropical plants alive during long voyages but also became popular décor in the Victorian drawing room. The picture at left shows some Wardian Cases. More about the history of the terrarium here
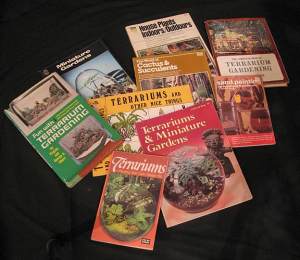
We are more familiar with the more groovy 70's version and many books on the subject can be found at almost any thrift store. The world wide intrawebs is a great place to look too. The picture at left shows some great thrift store finds

What is great is that everyone will have their own approach to making a terrarium. As a former theatrical set and costume designer, my terrariums are focused on the characters I create for them and the little stories I make up in my head while I am making them. I am not a horticulturalist and have had to experiment a lot and research a lot over the last year or so to get to the point where more stuff lives than dies so don't take my word as expert in any way. I really try to take the attitude that life is an experiment and if a plant dies it is ok and not to take it to heart too much- I just try to research a bit more for next time. I tell that to all my customers too - bring your terrarium back and I will replace the dead stuff. It is easier and less stressful that way. What I will share with you though is the result of my research so far and if you have other ideas about soil mixes or appropriate plants I say go for it and see what happens. Picture at left: But Mooo-oom- ALL the other kids are eating THEIR teachers..
Materials:
- Vinyl or latex gloves
- Glass container
- Glass lid for container
- Drainage rocks
- Activated carbon
- Terrarium soil
- Moss soil
- Tropical plant(s)
- Moss
Optional decor:
- Interesting rocks
- Glass chunks or beads
- Aquarium rocks
- Dollar store dinosaurs/toys/miniatures
or
- Polymer clay
- Bamboo skewers
- Minwax Helmsman Spar Urethane Varnish
- Glue
Step 1 - Choose Glassware
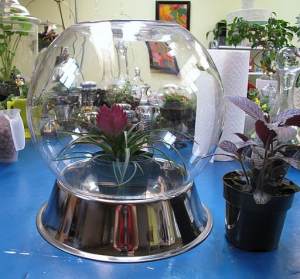
The container can be as creative as you are- I have used woks, lighting fixtures, old coffee pots, syrup containers etc. etc. I scour thrift stores and try to look at every item as a possibility but try to hook up your container with a lid. Without a lid you will have to water your terrarium more and the moss will never survive. The lid does not have to be made for the container- I have often used marbles, tea light holders or small bowls as alternative lids.
For this tutorial I am using a giant fishbowl and an old dog dish As seen in the picture on the left.
Clear glass is best for viewing and light. Make sure there is room for your plant- the spread of the leaves is often hard to accommodate. If the leaves touch the sides of the container they will rot from being constantly wet. Another option is to only use moss if you are feeling constrained by the size of your container
Step 2 - Drainage layer
Don't fill your container too much- remember to leave room for the plant to have air at the top
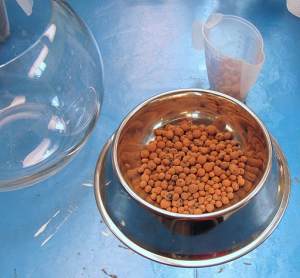
I use Hydroton which is a brand name for expanded clay pellets- available from your local hydroponic supply store- they will have to order in the small size- "8-16" is the size- refers to mm. I did see a big bag at the Rona in North Van recently for 36$
This stuff is good because it retains a little water so will give back water to your roots better than gravel and provide drainage.
I then pour a little small gravel on the hydroton to fill in the gaps so that the carbon and soil doesn't fall into the hydroton layer too much.
Gravel and Hydroton drainage layer
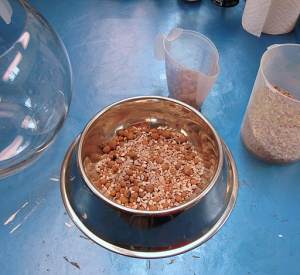
Step 3- Activated Carbon
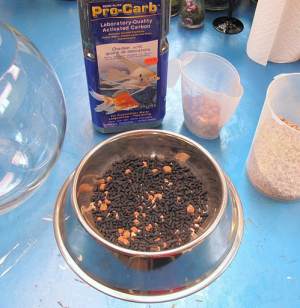
The activated carbon can be gotten from any aquarium shop- very pricey though- 30$ for a big container. The carbon acts as a filter to keep the standing water "sweet" - that is - not rotten and smelly. I have been told that it is not necessary but who knows? I add it anyway- all the terrarium books from the 70's say it is necessary.
I am a little cheap on the carbon- some books say to put in a layer an inch thick.
Step 4-Terrarium Mix

Schlomo who ran Main Street Plant Store used to sell me a terrarium mix but his store is shut down now.so sad
Anyway- he told me he used : Pearlite, Peat (coconut fibre), Hydroton, and
Slow acting fertilizer.
I now add a bit of potting soil because I found the soiless mix to be a bit too light in texture and did not retain enough water. I also add vermiculite (because I have it) and a bit of seed starter soil as I think it will help plants adjust to their new environments.
I put in about an inch depending on the size of the container-just need to leave room for the plant! You can landscape the soil so one side is deeper or make a mound in the middle.
Picture at left shows Ready to plant
Let's Continue with this terrarium making tutorial
 
The New Terrarium: Creating Beautiful Displays for Plants and Nature
Tabletop Gardens: 40 Stylish Plantscapes for Counters and Shelves, Desktops and Windowsills
 
Fairies, Gnomes & Trolls: Create a Fantasy World in Polymer Clay
|