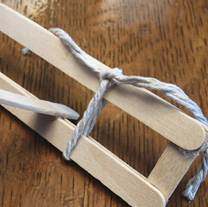
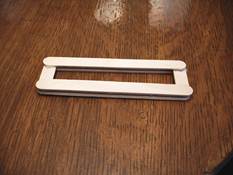
HOME

The Popsicle Stick Ballista


This is a great little ballista project that was submitted by a web visitor (Jesse L.) You can see more on his youtube channel here: Drako155Video where you can watch the build of this ballista.

Here is the finished Ballista

popsicle stick ballista


Materials:

  • 9 Full Popsicle sticks
  • 2 Three-Quarter Popsicle sticks
  • 2 Popsicle sticks cut in half (4 Half Sticks)
  • 6 Quarter Popsicle sticks (1 stick cut in quarters and the 2 quarters left from the ¾ sticks)
  • 3 pieces of string 3' , 3' and 12"
  • Hot glue

How to Build:

Make the base:

Glue together 4 full and 2 half sticks "log cabin" style with long sticks on bottom
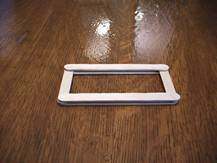

Make the Bow:

Glue together 4 full and 2 quarter sticks together "log cabin" style with long sticks on bottom. Only put the quarter stick half on the full sticks when gluing.


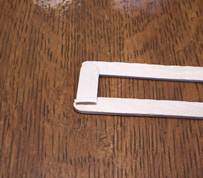
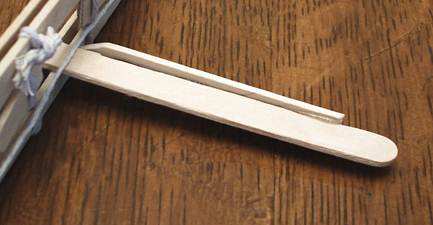
Glue full stick in middle of frame with ½ inch sticking out front. This is your projectile rail.


Take one 3' piece of string and fold it in half. Hold the folded tip in your lips (or get a friend to hold it for you) and twist the string together ten or twenty times.

Fold the string double again, but let the string hang by one end. It should twist itself together part way. Again, hold the loose ends in your lips and twist it all the way.


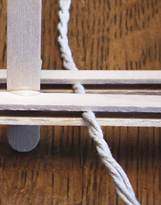
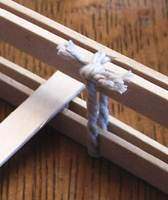
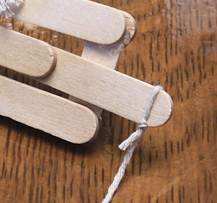
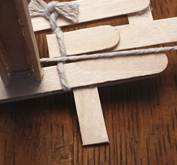
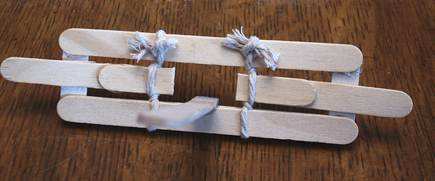
Thread the string between the two full sticks on your bow frame.

Wrap the string around toward the long side of the projectile rail and tie it.


Rotate the string so your knot is on the top and trim your ends.


Repeat for other side


Make the Arms:


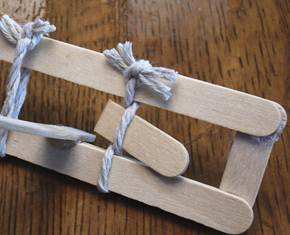
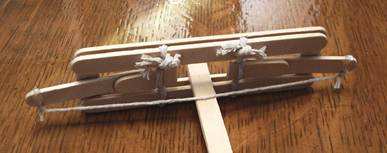
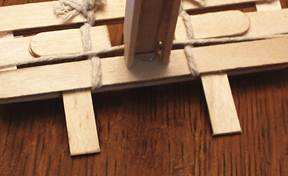
Use one of your quarter sticks, this is your rope twister. Insert the flat end between the ropes. Twist away from the outer frame rail towards the long end of the projectile rail the desired number of times.

After you have the rope twisted as tightly as you want it, put a generous gob of glue on the rope twister. Attach a half stick to the outside of the twister and hold in place for a minute or so to let the glue set.


If you did it properly than it should hit against the outer frame rail when pulled back towards the end of the projectile rail.


Repeat for the other side


String the Bow:

Put a slip knot in one end of your 12" piece of string and loop it around one end of the bow.

Tighten the knot so the string comes off the bottom of the bow.


Glue in place ( try to only glue the upper part of the loop because if the loose string gets glued it will hinder the movement of the string and the bow)

Tie another slip knot on the other end of the string so it lines up with the other end of the other bow arm. Tighten onto end of arm like before.


Glue in place.

**Your bow is now done and can be mounted on the base but you can add some firing rails to the projectile rail if desired(These will help in aiming the projectile)**

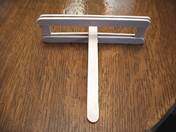
Make the Firing Rails:

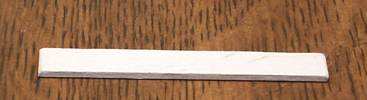
Take a ¾ stick and cut both ends flat


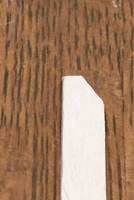
Cut an angle at one end of both sticks. This is the front.


Glue this on one side of the projectile rail so there is a small lip. 1/16 -1/8 if possible

(this does not need to be very high at all)


Reinforce this with more glue from the bottom if necessary. (Keep the top as clear from glue as you can because your projectile will need to move along this channel)

Repeat on the other side
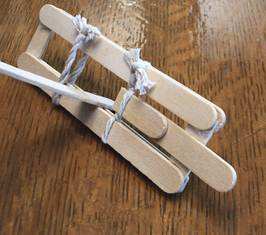
Attach Bow to Base:

Glue a ¼ stick in bottom of bow between the 2 long sticks on outside of string


Repeat on other side. Do your best to keep the lengths of these the same. If not than your bow will not sit straight on your base.


Glue feet and back of projectile rail to base
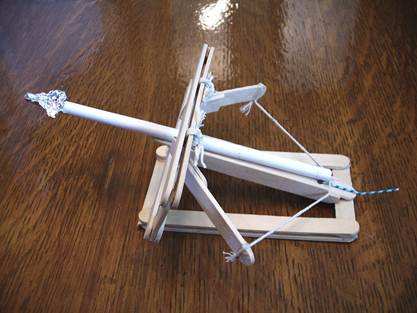
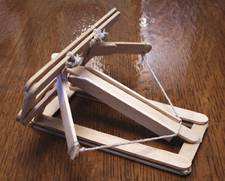


To Fire:

Pull back string and load with projectile (pencil, pen, drinking straw, etc.)

Release string to fire


My finished Ballista cocked, loaded and ready to fire


The projectile in the picture is rolled paper with an aluminum foil arrow head.

You may also notice that I have added a firing pin. This is just a bent paper clip resting in a drilled hole so you can pull the string off the firing rail and fire the ballista.
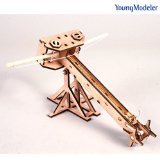
 

The Greek Ballista

Designed and made in the USA for better quality, better performance! The Greek and Roman Ballista is the granddaddy of all field artillery. This display quality model is fully functional and really works! The Ballista was an engine of war invented by the Greeks in 800 BCE, and later adopted by the early Romans. Ballistas were constructed of different sizes for the various purposes of siege and field warfare. The largest ones could throw projectiles weighing up to fifty pounds as far as 400 yards! The ballista uses a pair of skeins (bundles of twisted rope) for power. Similar to the working of a crossbow, the Ballista actually preceded the crossbow in western culture by over a thousand years and is where we get the word "Ballistic". This model shoots five-inch long, 1/2" diameter bolts (also called darts) about thirty to forty feet (when property constructed). It stands ten inches tall, twenty inches long and the arms sweep an arc over twenty inches wide. When not shooting bolts, this model is a great addition to your bookshelf or desktop. More than thirty five parts are included in this kit, but it can be easily assembled in one day. Everything you need is included except for glue and a few simple tools like scissors, sandpaper, a file (a utility knife would be helpful too) and about three to six hours of your time from start to finish. The instructions are highly detailed and complete with full-color photos, diagrams and historical notes. This kit can be assembled to a finished model in three to six hours, plus glue-drying time. Some light sanding may be necessary to smooth any rough edges. * Warning: This is a representative model of a real ancient military weapon. Use only with competent adult supervision. * Shown stained as red oak. The kit ships as a natural, unfinished poplar wood product. Colors may vary. * Can throw 40 feet when properly constructed and using appropriate missiles. Your performance may vary.


Custom Search

Return to Stormthecastle.com
Home


Table of Contents for this tutorial

BACK TO THE CATAPULT MAIN PAGE

  1. Make the Table Top Troll Catapult Home and materials requred
  2. Begin assembly of the sides and base
  3. Assemble the catapult firing arm
  4. Complete the assemblly and finish by painting
  5. Video of this catapult firing
  6. Books/Medieval store
  7. DVD's Documentaries about siege engines
  8. Free Catapult Plan

Check out My Store: Siege Engines you can buy at amazon.com

Unusual Siege Engine Kits

Kits to make big Siege Engines

Other Siege Engine Projects

More Creative Projects

Telescopes & Astronomy
Model Rockets
Model R/C Airplanes
Art & Drawing
For Writers
For Webmasters
Earn with your website

WEBSITES

Stormthecastle.com
Castlefiction.com
Epic Fantasy.com
The Medieval Armory
THe Fantasy Guide

The Heroic Dreams Blog
The Knight Medieval
The Telescope Nerd

MY STORES

Dioramas & miniatures
Siege Engines
Classical Guitar store
Telescope Store

Terrarium Store
Fantasy Art Books
Model Rocket Store
Siege Engine Store
R/C Airplanes Store
Swords


MORE

Links
Banner Exchange

---------
All Materials, unless otherwise stated are Copyright© 2001-2011
Kalif Publishing and StormtheCastle.com check out my copyright page for information about how to use any work on this site.


Hi, Thanks for visiting my website. My name is Will and if you have questions
or would like to
contribute you can

---------

Earning money with your website