Hi, Thanks for visiting my website. My name is Will and if you have questions
or would like to
contribute projects or ideas you can contact me
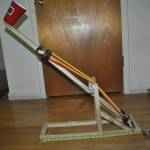
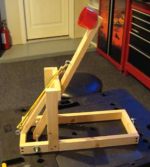
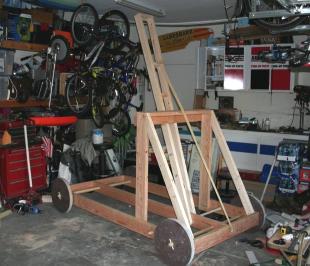
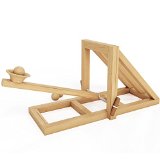
The Backyard Ogre Catapult
The base of this catapult is two feet long and the throw arm is about three feet long. It is made from 2x3's but you can make it from 2x4's also. It took me about two hours to make it.
This page is all about this catapult and how you can make one yourself.
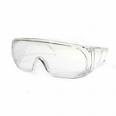
Safety Note: This is a powerful catapult that uses a bungee cord as its power source. You must use safety precautions when building and using it! And you must absolutely wear safety glasses when firing it off. This is in case the bungee cord breaks. And never fire any type of solid object with it. I use balls of aluminum foil and it works just as well with a tennis ball.
How far does it shoot? Quick Answer: A lot of people email me and ask how far this catapult fires. And to be honest its not a very powerful catapult. You may be able to get about ten yards out of it in the current configuration. It is just an easy to build catapult with no hassle. You can get a lot more out of it though if you use several bungee cords or surgical tubing. And if you change the wooden broomstick and hole configuration to something more efficient like a bearing or some kind of a set up with less friction like a teflon rod.
Want to make the OGRE catapult stronger, lighter and with a much farther throw? Two students did just that and they give us instructions with pictures on how they did it. The Steamlined/high-powered OGRE! This one shoots over 85 feet!
Have other people Made the Ogre Catapult? Or do you want to make one just a little bit smaller? Here is a user submitted version of the Ogre.
Like the Ogre Catapult but want to make one a little smaller? This is called "The Little Ogre" and it was made by a web visitor (John L. and his son.) They made it 75% the size of the original Ogre and also added some nice improvements like a better pivot for the swing arm and a locking mechanism to release it with. More information and pics here. The Little Ogre Catapult
See this catapult in action and learn more about it
How to Build the OGRE Catapult
A Note about Safety Before Starting! Please use all safety equipment when building and using this catapult! It is very powerful. Wear Safety Glasses and follow all safety rules if you are using tools and power tools. This project should not be done by minors without the supervision of an adult. Please be safe and never fire the catapult at a person or at someones personal property. Never fire any hard projectiles from the catapult.
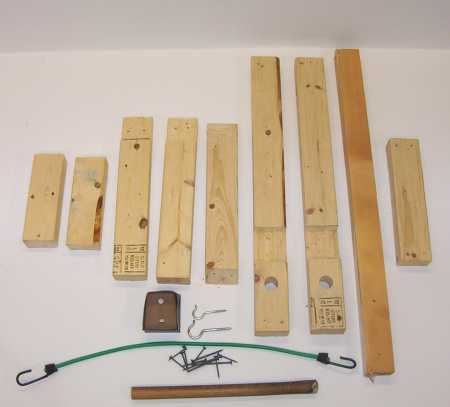
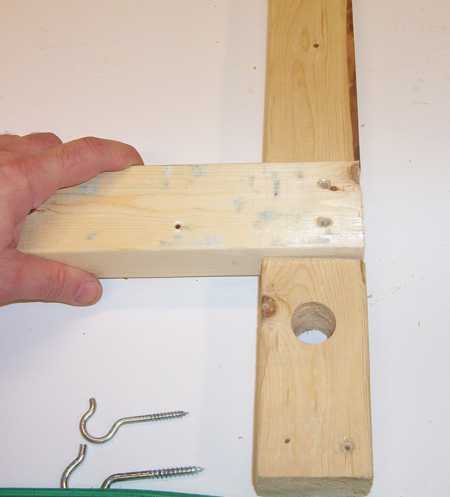
Above is a picture showing all the parts needed to build the OGRE Catapult. I will describe them and tell you a little bit about them. Lets start at the left. You can see that there are some cut notches and some holes drilled in the wood. I will explain what these are and how to do them.
From Left to Right the wood: (All wood is 2x3) The longest one is not quite 2x3 because I used a scrap of wood that I had but you can use a 2x3.
2 pieces each 7 1/2 inches long
3 pieces 14 inches long
2 pieces 24 inches long
1 piece 28 inches long
1 piece 10 1/2 inches long
The extra stuff along the bottom:
a cardboard cup (this holds your projectile)
2 large and strong eye hooks
a bunch of long screws (you can use nails but screws are better)
a bungee cord that is 24 inches long
a broom handle, dowel or pipe that is about one inch thick and 12 inches long
Okay, once you have these pieces of wood cut to length lets modify a few of them. This is the hardest part and once you have this done the rest of the catapult goes together very quickly and easily. We are going to cut two of the pieces of wood so we can form them into a joint like that shown below. It's not that hard. All you need is a handsaw, a chisel and some safety glasses and gloves. Making this joint is important because it will make your catapult much stronger.
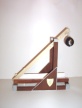
The annihilator! This is an eight foot long catapult built by a visitor to my website. He sent me pictures, a video and some tips on how he made this monstrous catapult! You can read learn more about it, see the pictures and watch the video of it launching here: Dr.Catapults Annihilator
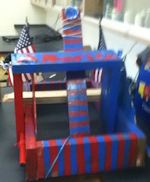
And here is a patriotic ogre catapult made by a web visitor! The Red, White and Blue catapult! It was made by Brent and Daniel. And it throws a tennis ball about 25 meters. It can send a water balloon around 6.8 meters.
BOOKS
Want to build a bigger, better, more powerful or fancier catapult? There are some great books available to you. These books, available at Amazon.com will help take your catapult building to new heights! Pun intended!
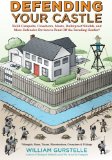
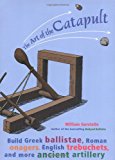
Your home is your castle, but could it withstand an attack by Attila and the Huns, Ragnar and the Vikings, Alexander and the Greeks, Genghis Khan and the Mongols, or Tamerlane and the Tartars? Engineer William Gurstelle, author of the bestselling Backyard Ballistics, poses this fascinating question to modern-day garage warriors and shows how to build an arsenal of ancient artillery and fortifications aimed at withstanding these invading hordes. Each chapter introduces new bad actors in the history of warfare, details their conquests, and features weapons and fortifications to defend against them-culminating, by the end of the book, in a fully fortified home. Clear step-by-step instructions, diagrams, and photographs explain how to build a dozen projects from table-top models of the Cheval-de-frise, Da Vinci's Catapult, and Alexander's Tortoise to the fullsize working Carpini's Crossbow, Hour-Glass Watchtower, and Palisade Wall. With a strong emphasis on safety, this book also gives tips on troubleshooting, explains the physics behind many of the projects, and shows where to find the best materials. It's sure to be an indispensible guide for at-home defenders everywhere.
Whether playing at defending their own castle or simply chucking pumpkins over a fence, wannabe marauders and tinkerers will become fast acquainted with Ludgar, the War Wolf, Ill Neighbor, Cabulus, and the Wild Donkey-ancient artillery devices known commonly as catapults. Building these simple yet sophisticated machines introduces fundamentals of math and physics using levers, force, torsion, tension, and traction. Instructions and diagrams illustrate how to build seven authentic working model catapults, including an early Greek ballista, a Roman onager, and the apex of catapult technology, the English trebuchet. Additional projects include learning how to lash and make rope and how to construct and use a hand sling and a staff sling. The colorful history of siege warfare is explored through the stories of Alexander the Great and his battle of Tyre; Saladin, Richard the Lionheart, and the Third Crusade; pirate-turned-soldier John Crabbe and his ship-mounted catapults; and Edward I of England and his battle against the Scots at Stirling Castle.
Kits and More Siege Engine Projects
Another Interesting Project: How to Build a Trebuchet
The Trebuchet was a unique siege engine of the middle ages. It was extraordinarily powerful and was easier for military engineers to build because it used gravity as the energy source. I also have a complete project on how to make the Little Dragon Trebuchet.
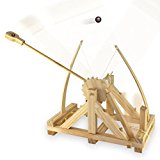
Engage in a fun hands-on learning experience and build your own desktop catapult with the included easy-to-understand instructions and pre-cut wooden pieces
Test your precision and your catapult's power, or change the trajectory angle with the adjustable cord
Take aim and fire away with five lightweight wooden ammo that's safe for indoor use
Replicate the ancient art of war, or learn about the physics and engineering while constructing the catapult
Guaranteed fun for all ages, imagination and wood glue not included
Comes complete with all pieces pre-cut and ready to assemble
Glue included
Suitable for beginner model makers
Easy to understand instructions
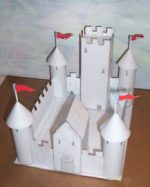
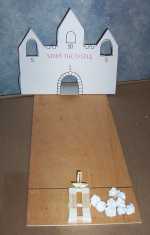
What good is a catapult if you don't have a castle to attack!
I have another project you might like. It is the Paper Castle and it has everything you could want in a castle making project including all the art work you can download. You just follow the instructions and make it yourself with some glue and cereal boxes. Build a Paper and Cardboard Castle It also has a learning sheet that helps to learn about castles when you are building it.
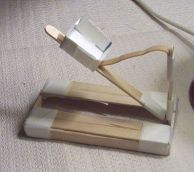
If you are looking for something easier to make you might want to try my project on making a popsicle stick catapult. Fast, easy and fun project! Goes great with the paper medieval castle. Make a popsicle stick catapult