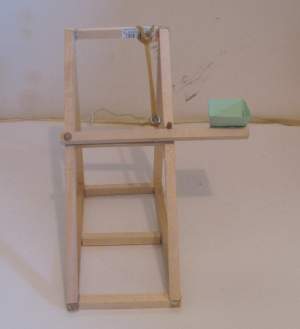
The big difference here is that the swing arm is not center of mass of the overall design. It is mounted sideways. You can see that on the left angle upright is where the swing arm pivots. And all the way out on the right is the cup for the projectile (crumpled piece of paper).
here is a better look:
This view gives you a really good look at how the configuration of the swing arm is really sideways.
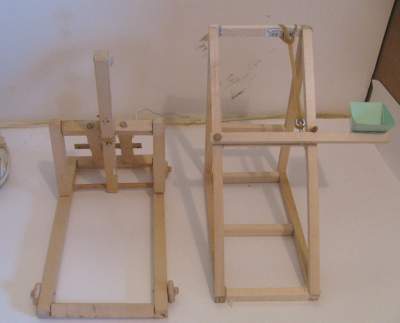
Here is the sideways one right alongside a regular one. In this view you can really see the difference.
Anyway, It is an interesting experiment and there are some nice things about it.
This following picture gives you a closer look at some of the parts of the catapult.
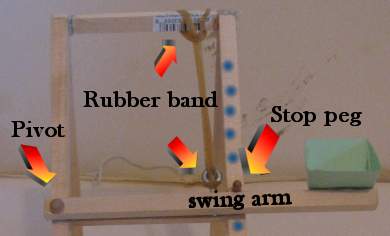
The pivot is what the swing arm pivots on. I drilled a hole in the swing arm and a hole in the angled upright. I then pushed a wooden dowel through it and glue the dowel to the angled upright. The swing arm moves freely on this dowel.
The Stop peg is what stops the swing arm in its forward motion. When the swing arm hits this it is stopped and the projectile flies out of the green cup.
The blue dots are just drawn on the picture. They show that you could have a series of partially drilled holes and you could move the stop peg into any hole to change the angle the projectile is fired at.
It is important to keep the rubber band within the structure of catapult. You would get more force if you attached it further out on the swing arm nearer the green cup but this causes even more imbalance.
Pathfinders Medieval Wooden Catapult Kit
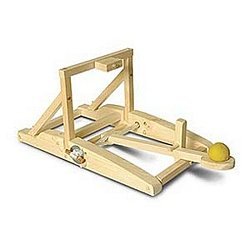
Just add glue, scissors and an appreciation for the physics and art behind these medieval siege engines. High-quality models hurl a small ball more than 15 feet in 1 throw, with adjustable pads that change the trajectory angle and encourage experimentation for greater accuracy. Pre-cut, pre-drilled solid wood pieces are easy to assemble; models can be build in about 1 to 2 hours. 
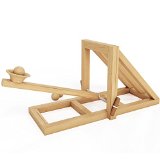
Working Wood Catapult DIY Kit, 6" X 5" X 10"
A fun, wooden catapult DIY kit for all ages to enjoy. Every piece is already pre-cut for you as you will not need to make other hard drilling work. All you need to do is assemble following the instruction and you will have a working catapult in no time. You may enjoy it with another friend or family to see this medieval wonder comes to life.
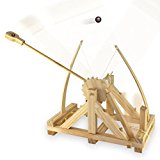
Leonardo DaVinci Catapult Kit
- Comes complete with all pieces pre-cut and ready to assemble
- Glue included
- Suitable for beginner model makers
- Easy to understand instructions
Catapult Kit by Abong
- The Abong Catapult Kit Makes Medieval Warfare Fun and Educational
- Well Written Color Instructions and Laser Cut Hardwood Make Construction Easy
- Test Your Accuracy and Distance Firing the Wooden Ammo
- Build Multiple Kits to Wage Desktop Warfare
- Fun For Kids and Adults Alike to Construct
MOTA Catapult - Desktop Battle Kit -
- Engage in a fun hands-on learning experience and build your own desktop catapult with the included easy-to-understand instructions and pre-cut wooden pieces
- Test your precision and your catapult's power, or change the trajectory angle with the adjustable cord
- Take aim and fire away with five lightweight wooden ammo that's safe for indoor use
- Replicate the ancient art of war, or learn about the physics and engineering while constructing the catapult
- Guaranteed fun for all ages, imagination and wood glue not included
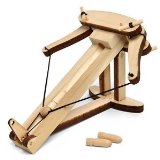
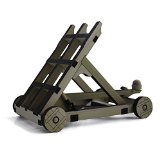
Miniature Ballista Kit - Wooden Desktop Warfare Ballista
The ballista was the ultimate artillery weapon of the Roman Empire. Similar in appearance to a giant crossbow, it was powered by massive bundles of twisted horse hair. The bolts it fires would mow down enemies and fortifications alike. This kit is based on the Roman design. It is laser cut from select hardwood for easy assembly and reliable performance. This tabletop kit has been designed for simple assembly. Designed with interlocking parts, a simple, reliable trigger, high strength cordage and lightweight projectiles this ballista is incredibly durable. Three easy-to-follow rules for public demonstration are provided to ensure everyone's safety. |