Want to see a video of it in action: The Popsicle Stick Catapult firing off! (Quicktime MOV) This catapult is pretty strong and really fires a projectile so in order for the whole thing not to go flying I had to nail it down. You can see the nails in the video.
 Note: Some people want to build this version of the popsicle stick catapult. This is the teeny-tiny catapult. It is part of the Storm The castle catapult game. You can see the project and the game here. Note: Some people want to build this version of the popsicle stick catapult. This is the teeny-tiny catapult. It is part of the Storm The castle catapult game. You can see the project and the game here.
I have this project in a Microsoft Word Document if you need to print it up: How to Make a Popsicle Stick Catapult
A little About the Triangle - The thing that makes this catapult so easy to build yet so strong (You can use quite a potent rubber band on this catapult and fire your projectiles a long way) is the use of the triangle which is the strongest geometric shape and is used in everywhere in architecture. It is what is used to make geodesic domes which is what Epcot center is made out of. The Geodesic dome is a series of triangles that are formed together so the triangles are now in three dimensional shapes like this catapult.
Let's Build This Catapult
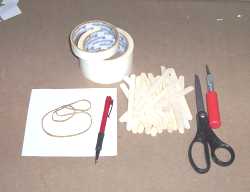
Here is what you need to make this Catapult
32 Popsicle sticks, some masking tape, pencil, rubber band, scissors, X-acto knife (optional), piece of paper about 6 inches square.
 Here is the basic process for taping sticks together. You lay out your tape with the sticky side up then place two sticks end to end right on it. But just press the sticks down firmly on the tape, don't wrap it up yet. Here is the basic process for taping sticks together. You lay out your tape with the sticky side up then place two sticks end to end right on it. But just press the sticks down firmly on the tape, don't wrap it up yet.
 Place a third stick on top of these two sticks, right in the middle. Now you can wrap the tape around all three. Do at least two full revolutions of the tape. Place a third stick on top of these two sticks, right in the middle. Now you can wrap the tape around all three. Do at least two full revolutions of the tape.
 Make three of these. This is the basis for your first triangle. Make three of these. This is the basis for your first triangle.
Now, as in the photo shown below, place these three popsicle stick assemblies end to end and then tape them together. Use at least three wraps of tape at the joints to make it nice and strong.

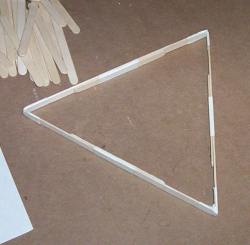
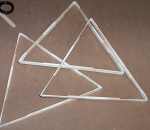
Now fold the length of sticks into a triangle and tape the end together. You now have your first triangle. Do this process two more times so you have three triangles.
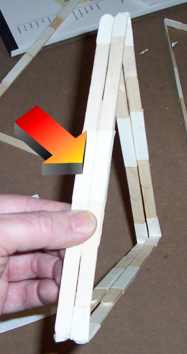
Now hold two of the triangles together side by side and tape them only on one side. The red arrow shows the side that I have taped together. Our Geodesic triangle is going to tape shape now.
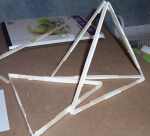
Now lay one triangle down on the table and splittling the legs on the two you taped together slide them right over the one on the table.
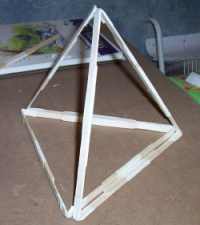
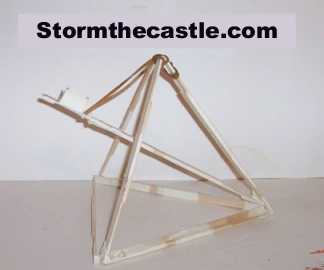
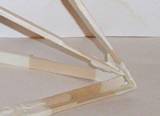
Here is the completed triangle, now all that remains is to tape all the shapes together.
Now let's build the arm of the catapult.
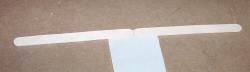
We use five popsicle sticks and this picture shows you how to arrange them. Put three end to end then put two right on top of them. the pic shows the two top sticks like this just so you see the five sticks, you place the two sticks right on top of the three then tape them.

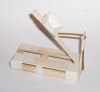
Here is my catapult arm completed.

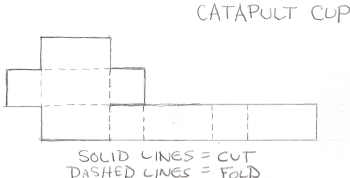
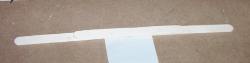
Now make the catapult cup out of paper. Here is a template of how to cut it out. All dimensions are either one inch or one half inch. Draw this out on paper and cut it out. Fold it along the dotted lines to form a cup and tape it into shape. Then tape it to the arm of your catapult. Don't tape it to the end of the arm, affix it about an inch from the end so you have room to press down the arm with your finger.
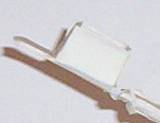
Here is the paper cup taped onto the end of the catapult. Use plenty of tape and make it nice and strong.
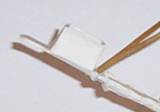
Now wrap one end of the rubber band around the catapult arm just under the cup and tape it firmly in place.
Using a couple of pieces of tape connect the other end of the catapult arm to the place where the three triangles meet. This is a bit tricky to do but do your best and try to secure the catapult arm firmly. But it has to move freely. Think of the tape as being a kind of a hinge. If you want to get creative you could use a paper clip by drilling a hole in the capapult arm and putting the paper clip through it so it moves freely then taping the other end of the paperclip to where the three triangles meet.
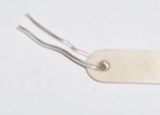
Here is a stick that I drilled a hole into and placed the paperclip through. This end will freely rotate and the loose ends shown here will be taped to the catapult where the three triangles meet. This will make a strong yet very free flowing pivot point.
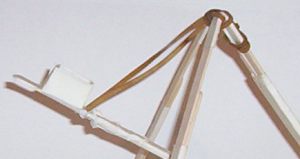
The only thing left to do now is to wrap the other end of the rubber band around the top of the catapult and tape it firmly into place. If you do not have a large rubber band you can chain a group of small ones together then use them. Experiment with the rubber bands and get a power set up that you like.
Congratulations! Your Popsicle Stick Catapult is complete. Now fire it off and have some fun.
Experimenting with the catapult. I was pretty happy with the results just from this basic design and I didn't have to tinker with anything to get the catapult to really fire off some projectiles. You can tinker with this and get it to fire further. Some things you can do are change the length of the catapult arm and change the rubber band.
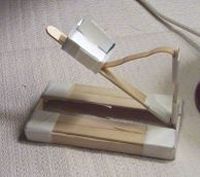
The Popsicle Stick catapult
Here is another popsicle stick catapult you might be interested in. It is a little bit more of a challenge but it looks more like a traditional catapult.
RESOURCES
 1000 Woodsies Craft Sticks 1000 Woodsies Craft Sticks
- Natural raw wood
- Birch wood, non food safe
- Great for use in classroom projects, party crafts, and camp crafts
- Ideal for crafters, teachers, and students
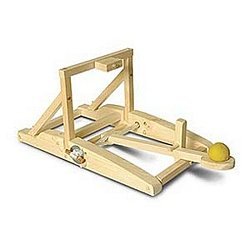
Working Wood Catapult DIY Kit, 6" X 5" X 10"
A fun, wooden catapult DIY kit for all ages to enjoy. Every piece is already pre-cut for you as you will not need to make other hard drilling work. All you need to do is assemble following the instruction and you will have a working catapult in no time. You may enjoy it with another friend or family to see this medieval wonder comes to life.
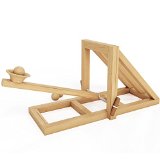
MOTA Catapult - Desktop Battle Kit -
- Engage in a fun hands-on learning experience and build your own desktop catapult with the included easy-to-understand instructions and pre-cut wooden pieces
- Test your precision and your catapult's power, or change the trajectory angle with the adjustable cord
- Take aim and fire away with five lightweight wooden ammo that's safe for indoor use
- Replicate the ancient art of war, or learn about the physics and engineering while constructing the catapult
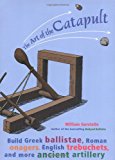
The Art of the Catapult: Build Greek Ballistae, Roman Onagers, English Trebuchets, and More Ancient Artillery |