
How to Make a World War 2 Diorama - Part 4 Finishing the detailed terrain features
In this part of the tutorial I show you how to do the detailed terrain features like the trees, grass, dirt, soil and other things. This part of the diorama making tutorial also has a video. You can find it at the bottom of this page. In the video I show you everything step by step.
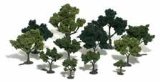
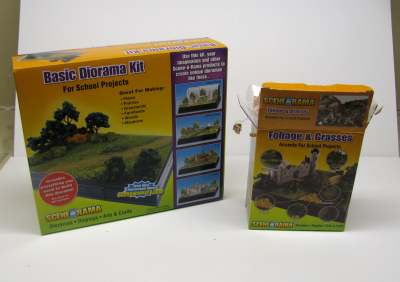 I use a wide variety of materials when making dioramas and I improvise a lot of various materials. For this part of the tutorial I am using one of these Woodland Scenics Diorama kits. The picture at left shows two different sizes. The Basic Diorama Kit on the left has a lot of materials including trees. The foliage and grasses kit on the right doesn't have trees. This kind of kit (called Scene-a-Rama) is a nice way to get a little bit of a variety of textures and terrains cheaply.
Scene-A-Rama Basic Diorama Kit
Scene-A-Rama Bushes, Foliage & Grasses Kit
Okay, Let's continue making this diorama by adding the terrain and trees
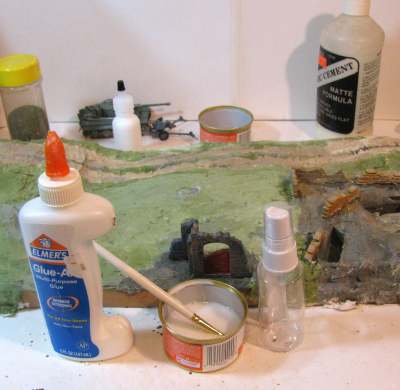 The Grass textures will be sprinkled onto the base of the diorama. This will give us a great look of grass. To attach this terrain material to the diorama you should mix up a very watery solution of white glue. I use 1 part white glue and 2 parts of water. Mix this up in a container and if possible put it in a spray bottle.
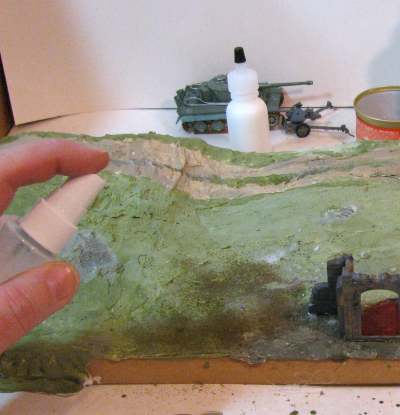
Spray the glue onto the surface of the diorama in a thick coat. At this early stage you can brush it on and or brush it around so it makes a nice thick layer. Do not try to do the whole diorama. Do small sections at a time so the glue doesn't dry on you!
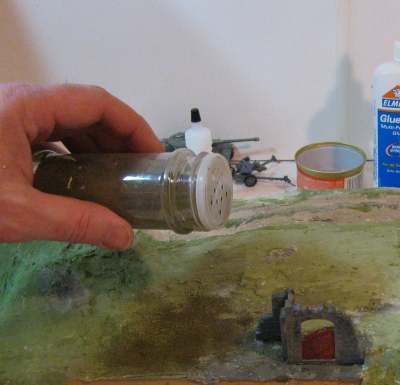
Now sprinkle on a thick layer of your terrain texture.
I put it in a spice bottle. This works really well for getting the texture spread out nice and evenly.
Some Notes: Generally you don't want the whole surface of the diorama to be an evenly distributed color. You want the color to vary. This simulates real life better. So use different shades if you can and even mix the shades to get some nice variations.
Once you have completed covering the whole diorama you should let it dry then use your spray bottle full of watery glue and spray the whole terrain surface down. This will securely affix the texture materials down.
Next you start putting in the highlighting rougher textures. Think of these as the small bushes and rough.
These will be little clumps of various colors, shapes and sizes. You glue them in place then spray them with the liquid glue to affix them in place.
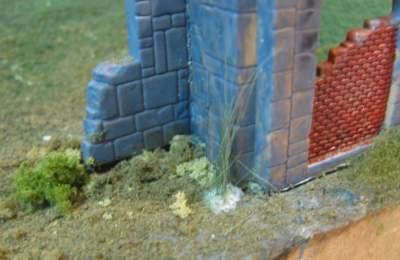
In the picture shown You can see long stalks of grass. I made this using the bristles of a paintbrush and I have a tutorial on how to do this here: Making tufts of Grass for your diorama
So, the basic process is to start with the very fine materials then move on to the rougher materials. Then you put in the roughest textures that are like bushes. Finally you add the trees.
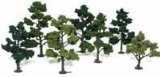
 A Note from Will: If you need to know how to make trees I have a tutorial on how to do it. It includes making traditional trees from the Woodland Scenics Kits and how to improvise your own trees from wire. How to make miniature trees - Trees at Amazon.com
Let's add the trees
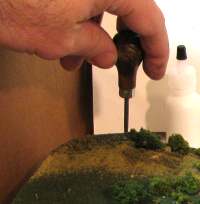
Pierce a small hole in the surface of the diorama where you want the tree to go.
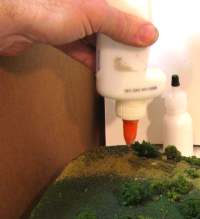
Put glue in the hole. (If you have a hot glue gun it will work very well. Just be conscious of the fact that excesss hot glue can look a bit messy and is difficult to paint)
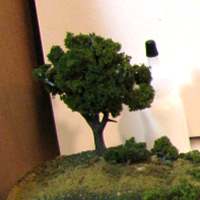
Insert the tree.
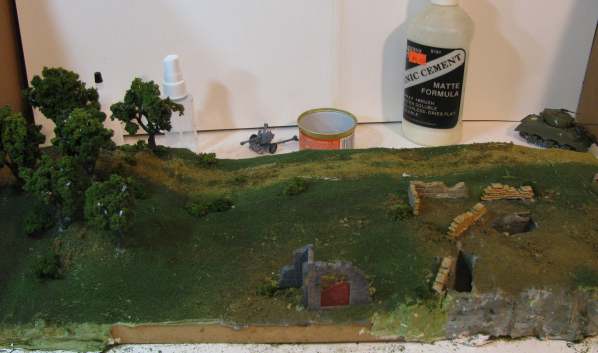
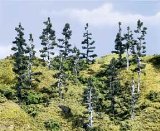
Here is the diorama with all the terrain textures and trees in place.
A couple of things to note: The trees tend to form an irregular shape. Don't space them evenly apart. And, I generally put the large trees to the left. This forms a nice tapering shape into the middle of the diorama. And, the color green of the grass is the darkest on the left of the diorama (which is inside a forest) and lightest toward the right.
![]() Okay, Let's move on to the next part of the tutorial (Part 5) How to make barbed wire
Okay, Let's move on to the next part of the tutorial (Part 5) How to make barbed wire
Here is the Video for this part of the tutorial
Scene-A-Rama Kits
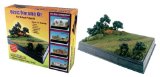
Scene-A-Rama Basic Diorama Kit - Use this kit to create a flat, landscaped surface for your project. It includes everything you need to make plains, prairies, grasslands, farmlands, woods and meadows.
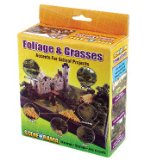
Scene-A-Rama Bushes, Foliage & Grasses Kit - Use this kit to create short and tall grasses, weeds, bushes, shrubs, hedges, ivy, flowering plants and roads and paths.
|
|
|---|


- Index
- What is a diorama?
- A short history of Dioramas
- Diorama Books
- Painting Miniatures
- Diorama Ideas
- Diorama Examples
- Diorama Making for the artist
- Diorama Making supplies & Tools
- Dioramas by Web Visitors
- Printable diorama box
- Diorama Images
- Diorama Making Videos
- Diorama words, terms and definitions
- Waterfalls and water in dioramas
- Dioramas Made by Charles
- Dioramas Made by Joseph
- Dioramas made by Marshall
Will's Big Diorama Projects
- The Wall Diorama
- Storm The Castle Diorama
- The Medieval Village
- The 300 Diorama - Battle of Thermopylae
Types of Dioramas to Make
- Paper Dioramas (Tatebanko)
- WW2/Fantasy
- Action Figure Diorama (IronMan)
- Egyptian Diorama
- Military Dioramas
- Jack and the Beanstalk
- The Secret Grotto Diorama
- Make a waterfall diorama
- How to make a waterfall
- Rock Climbing diorama
- How to make a Paper Mache Diorama
- Diorama inside a lightbulb
- Insect Maker Diorama
- Mississippi River with Indians
- Really creative shoebox diorama
- Dinosaur Diorama
- Make a secret diorama
- Wildlife Diorama (African Oasis)
- Firefly Diorama with real blinking lights
- Rainforest Diorama
- Ocean Diorama
- Shadowbox diorama
- Make a shoebox diorama
- Massive Castle Diorama
- Diorama Examples
- Polymer Clay
- The Battle of Thermopylae Spartan Warrior Diorama - A tutorial
- HALO Diorama
- Wizards Tower Foam Diorama
- Cemetary Diorama
- Trench Warfare
- Simple Nature Diorama
- Water Woman Diorama
- WW1 Diorama submitted by a web visitor
- Christmas Holy Land Diorama submitted by a web visitor
- New and easy Rainforest diorama
- New Section: Making WW2 Dioramas and Miniatures
- Castle Siege Diorama project
- Easy water scene diorama making
- Roman Bath
- Colonial Times Diorama
- Desert Diorama
- Tree diorama that changes over time
- Make a Triarama
- Bridge with Dragon
- 3 Succubi Fantasy Diorama
STORES
- Woodland Scenics Terrain Materials
- Revell Model Kits
- Tamiya military Models
- Woodland Scenics Turf and terrain Materials
- Diorama Making Books
- Diorama Kits
- Scene-A-Rama diorama Kits
- Plastic Scale Dinosaur Diorama Kits
- Harry Potter Dioramas
- Diorama Foam
- Conflix Medieval Buildings for Dioramas and wargaming
- Tatebanko Paper Dioramas
- Woodland Scenics Grand Valley
- Woodland Scenics rolled Grass -(RG)
- Diorama Accessories
Plastic Models
- Tiger Tank 1/72 Scale
- Sherman Tank 1/72 Scale
- How to make plastic models: Tips, Tricks and techniques
- Painting Miniature German Soldiers (1/72 Scale)
- Painting Miniature American Soldiers (1/72 Scale)
Check out the Diorama and Miniature store
*Short Diorama Tutorials*
- Pencil shavings into terrain textures
- Use Plexiglas to make bodies of water
- How to make bricks
- Make Water Effects
- How to make a waterfall
- How to make snow for your diorama
- How to Make realistic tufts of grass
- How to make trenches
- Terrain making with foamcoat
- Creative terrain shell making
- How to make Miniature Trees
- How to Make rubber rock and wall molds
- Motorize a drawbridge on your diorama
- Using foam to make a diorama
- How to make good looking rubble using cork
- Creative Shoebox Diorama Ideas for School
- A foam based diorama with water from start to finish
- Some great WW2 diorama trench making tips with video
- How to make plastic models- Tips tricks and techniques
- A look at some diorama buildings
- How to make barbed wire
- How to make mud in a diorama
- Diorama Tip - plastic models and resins
OTHER PROJECTS
Make a cardboard Samurai Sword
Make a Cardboard Medieval Shield
How to make a fantasy shadowbox
---------
All Materials, unless otherwise stated are Copyright©2001-2015
Kalif Publishing and StormtheCastle.com

Hi, Thanks for visiting my website. My name is Will and if you have questions
or would like to
contribute you can
---------
